
WIN Career Readiness System

Assignment Manager
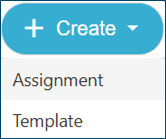
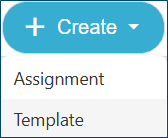
Assignment Manager is a feature that allows instructors and administrators to create and manage a library of assignments with selected content and instructions for learners. To access Assignment Manager, click Assignments in the top menu. That will bring you to the Assignment Library. To create a new assignment, click the Create button and select Assignment from the dropdown menu.
The Assignment Wizard will load, showing four steps to create a new assignment:
- Add tasks
- Add instructions
- Establish a schedule
- Select your learners
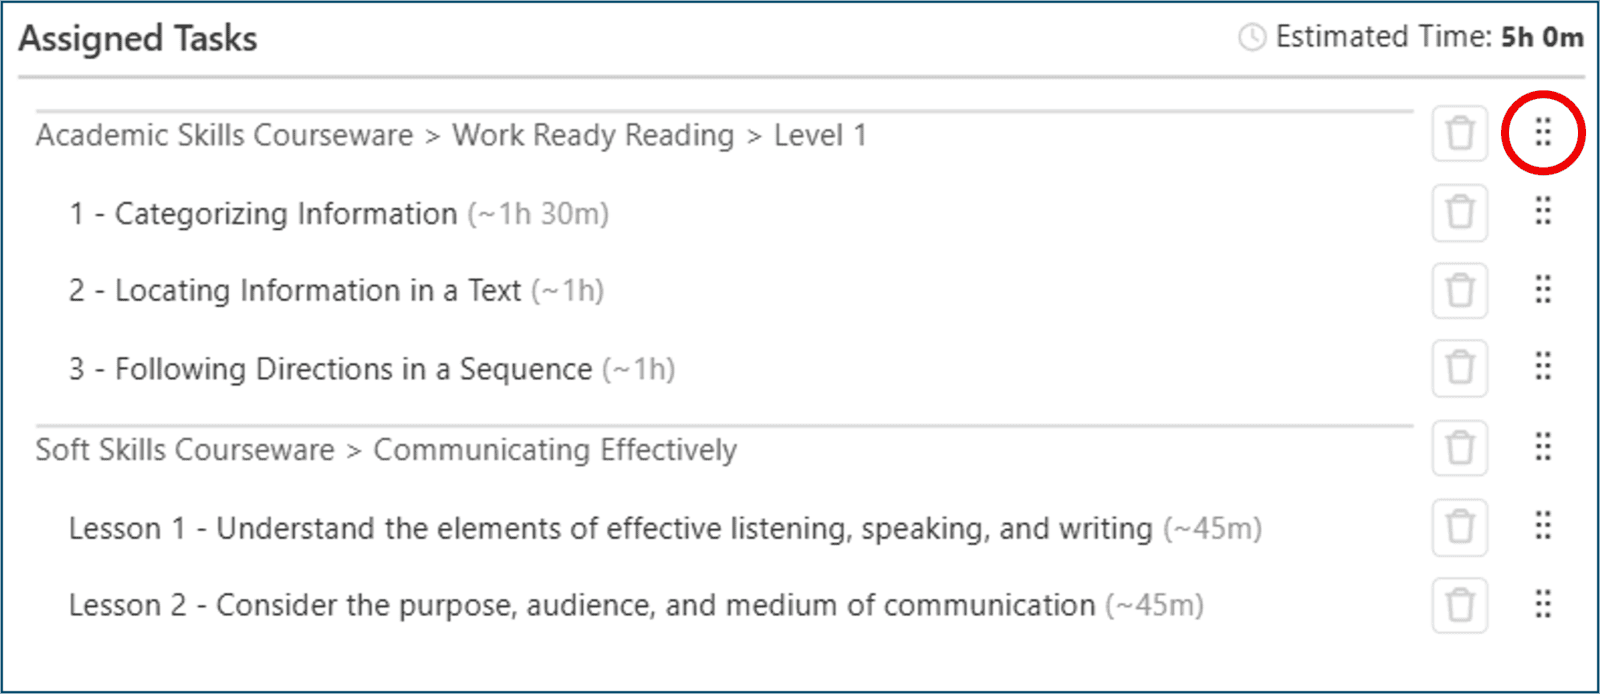
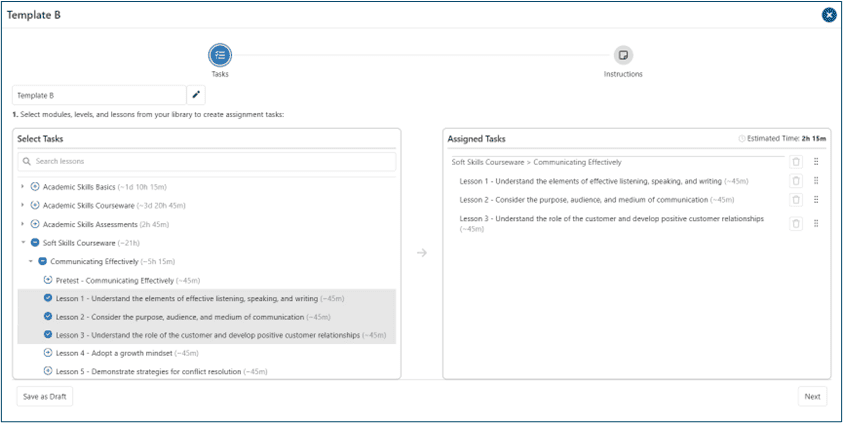
First, give the assignment a name. Expand the solutions to see the various modules, levels, and lessons. You can also see an approximate duration for each task, which can help to determine how many tasks to include in one assignment. You can assign tasks by group or by individual lesson by clicking the Plus icon. You can also include lessons from different solutions and modules.

When you add your selected tasks, they are grouped by module or solution. You can move the lessons around by clicking the Drag and Drop icon and dragging the lessons where you want them to be. To remove lessons from the assigned tasks, click the Trash icon.
You can click Save as Draft to return and finish setting up the assignment later. Once the desired tasks are in the assignment, click Next to continue.
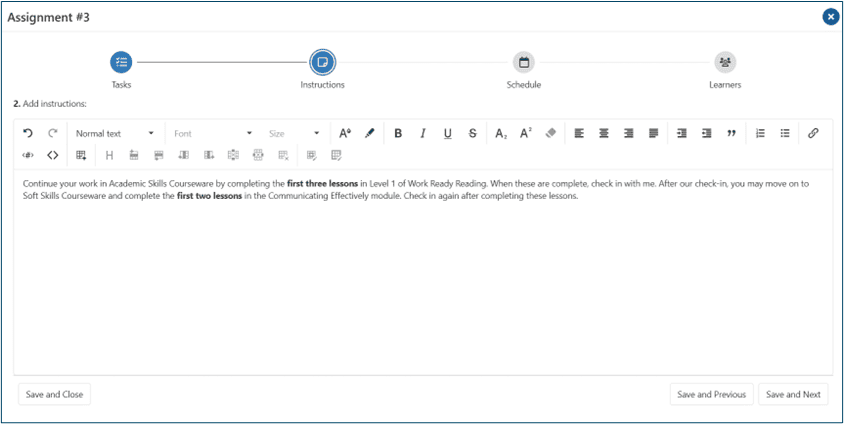
The next step is to add instructions to the assignment. There are several formatting tools available that allow you to include images, hyperlinks, tables, etc. with the instructions. When you finish the instructions, click Save and Next to set the assignment schedule.
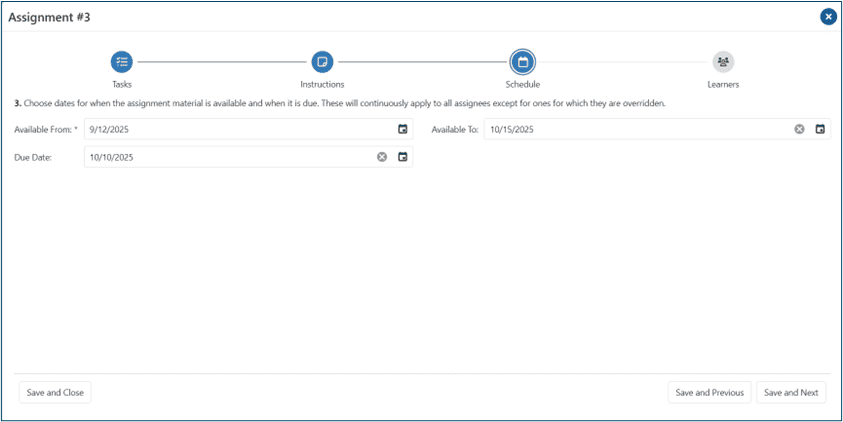
Here, you'll set the date the assignment will be available to the students, the date the assignment is due, and if desired, the date the assignment will no longer be available to students. When you have set your assignment schedule, click Save and Next to move on.
You can add learners to the assignment by individual learner or by class. To assign individual learners, click the learner radio button.

The learner list can be sorted and filtered by first name, last name, or username. To add students to the assigned learners grid, click the Plus icon next to their name.
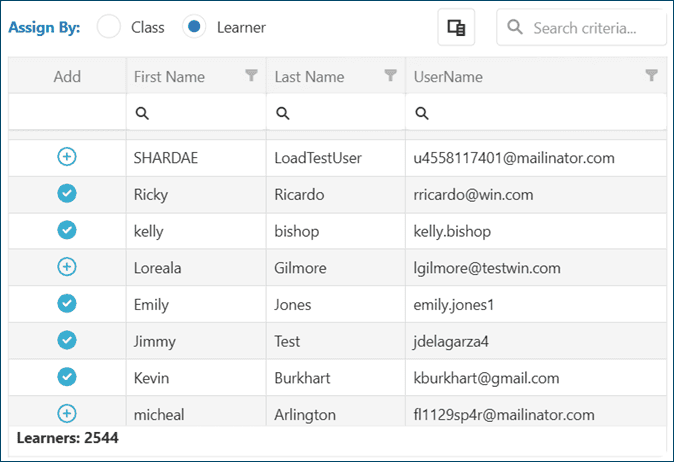
 next to their name and set their dates. To remove a student from the list, click the Trash icon
  . You can also bulk remove or bulk assign alternate dates by multi selecting users in the grid and using the bulk action icons at the top.
To assign by class, click the class radio button and then the Plus icon next to the class name. That will add all of the students in that class to the assignment grid.

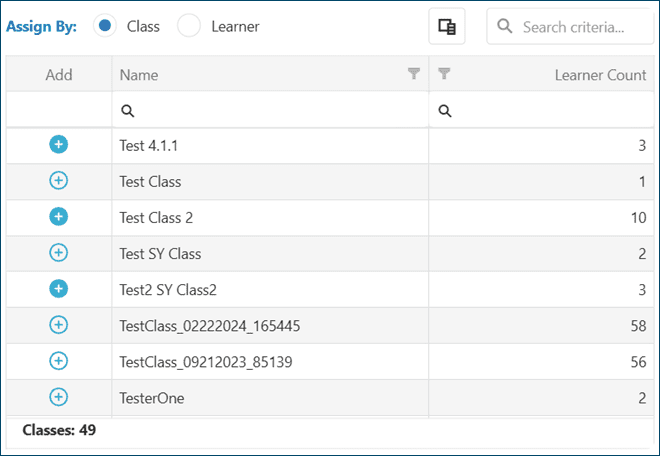
You can set their individual schedule if different from the default, or you can remove learners as desired by clicking the Trash icon .
When the desired list of students is in the assigned learners grid and all of their schedules are set, click Submit to finalize the assignment. The assignment will appear in your Assignment Library. You can edit it at any time by clicking the assignment name.
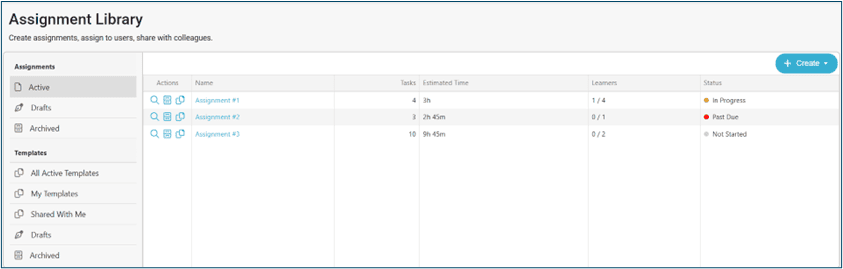
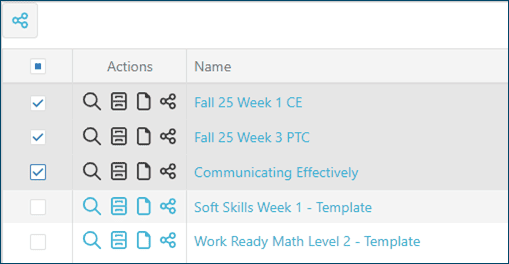
In the library, you can see a summary view of each assignment's makeup and status. You can see how many tasks are in each assignment, the approximate time it should take to complete each assignment, how many learners have been assigned the assignment, and the overall status of each assignment, whether it's not started, in progress, completed, or past due. You can also view the date that each learner completed the assignment.
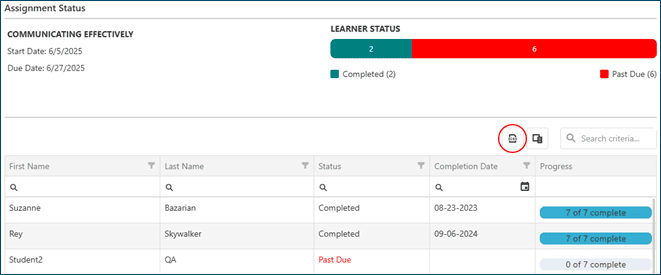
To see more details about an assignment in your library, select the View icon  , which allows you to see what tasks are in the assignment, which students have been assigned, and a high level view of each student's progress. You can export the Assignment Status grid to an Excel sheet by selecting the Export icon.
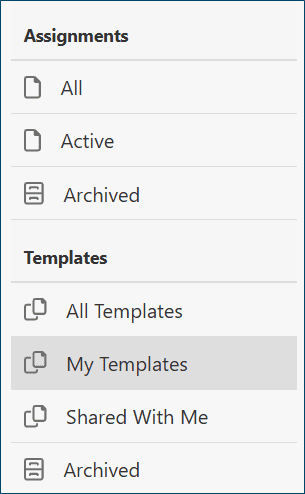
The Archive icon  archives the assignment to remove it from your library. You might choose to archive an assignment at the end of a semester, for example. You can retrieve an archived assignment by selecting Archived from the filter and then click the Restore icon
 .
.
Templates are reusable collections of tasks that can be saved and used to create assignments, or can be shared with other teachers in your organization.
The Assignment Wizard will load, showing two steps for creating a template:Add tasks
- Add tasks
- Add instructions
Name the template, then add lessons by selecting the Plus icon next to the module. You can add individual lessons or whole modules. You can select Save as Draft to exit and return to finish setting up the template later. When the desired tasks are in the template, click Next to add instructions.
There's a wide range of formatting tools available, and you can include images, hyperlinks, tables, and more. Once you’re finished with the tasks and instructions, click Submit to save the template to the library.
Turn a template into an assignment by clicking the Make Assignment icon , then complete the steps in the wizard to name the assignment, set a schedule with available from and due dates, and add learners to the assignment.
The advantage of first creating a template is that you can use that same template year over year with different students.
 next to the template name to see a list of teachers and administrators you have permission to share with. Select who you would like to share the template with and click Submit.
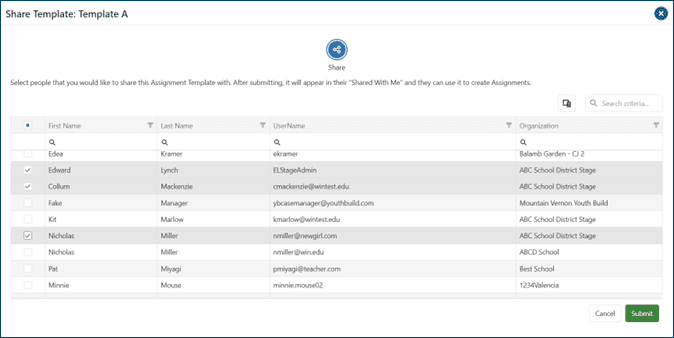
If you find that an instructor is in an organization doesn't have access to a product in your template, you'll have to remove that teacher from your list.
You can share multiple templates at once by going to My Templates and selecting which templates you want to share, then clicking the Share icon at the top of the list.
next to the template name.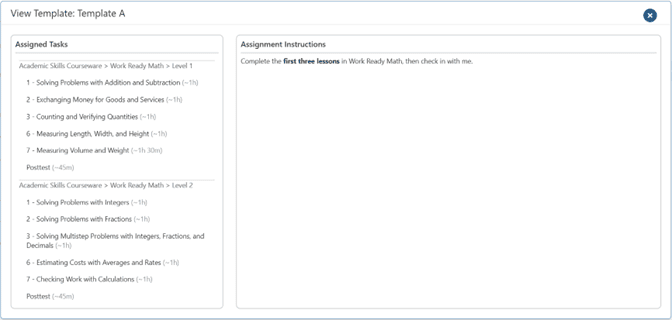 and complete the steps in the wizard. You can also reshare templates that have been shared with you.
 . This will save all of the tasks and instructions in the assignment as a template to share with other teachers or to use later with a different group of students. Save As Template does not save the schedule or students in the assignment.